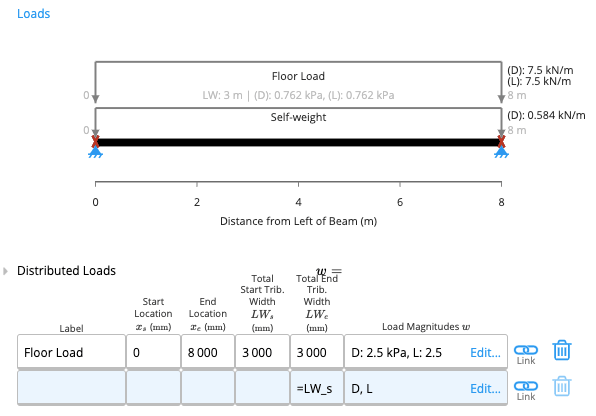
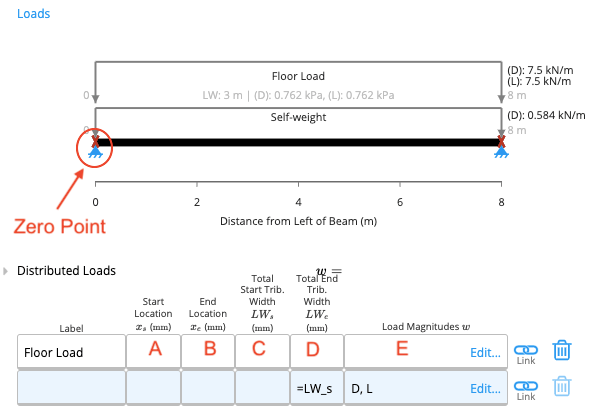
Input Parameters
Understanding Tributary Width
Every structural element has an area from which it obtains its load. As with any other area, this can also be expressed as a product of length and width. The length of this area is usually either the length of the element itself or the length of the distributed load (B-A from the table). Tributary width is simply the width of this area. To better illustrate this concept, consider a floor that is supported by members spaced ‘s’ mm apart.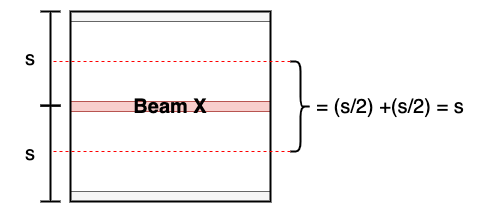
Key Concept: For most cases, the tributary width is the same as member spacing.
- The starting and ending tributary widths will be different
- You’ll need to enter different values for Total Start Tributary Width and Total End Tributary Width
Load Magnitudes
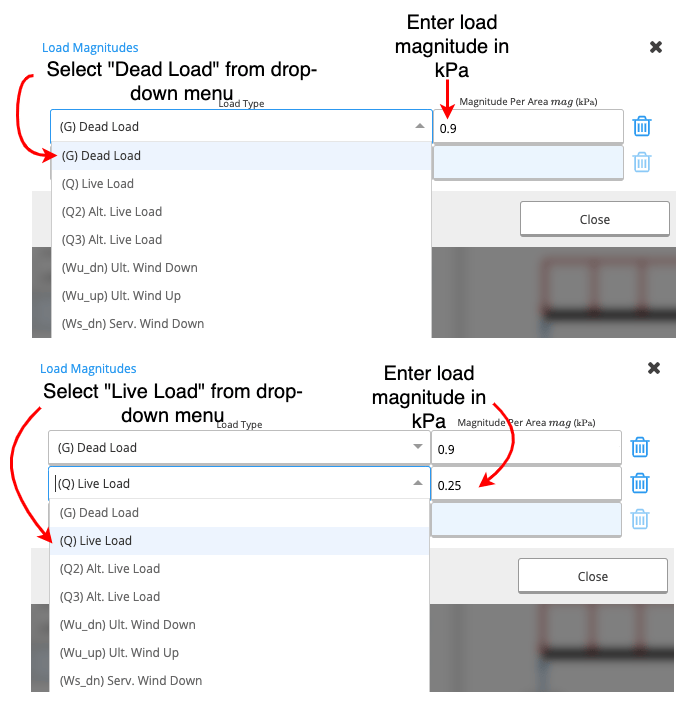
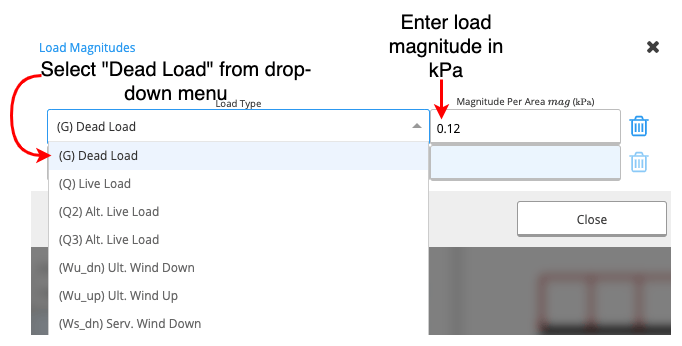
When you click on the Load Magnitudes cell, a new table will appear (see below).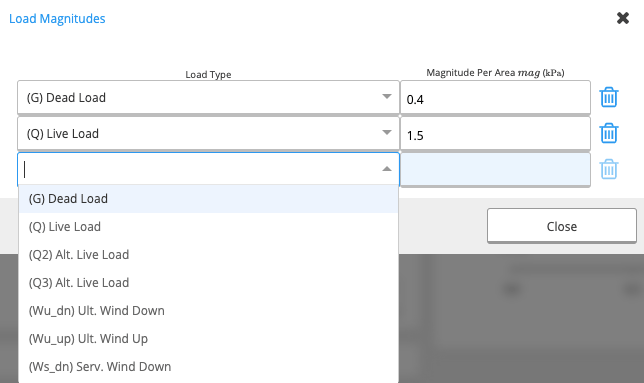
- First Column: A drop-down menu from which you can choose your load type.
- Second Column: You can input the magnitude of the load in kilopascals (kPa).
Examples
Example 1
Task
Input a live load of 1.5kPa on a floor joist with a member spacing of 450mm.Method
1
Set the Range
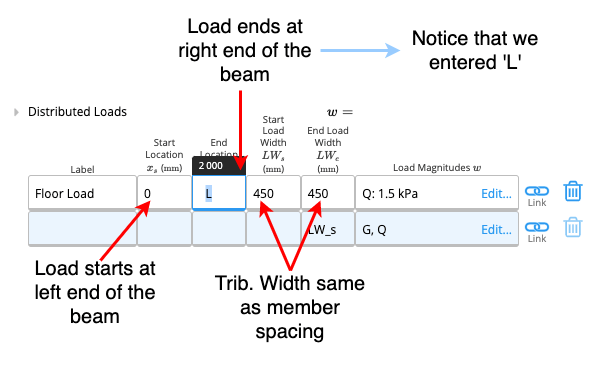
Enter 0 for Start Location and L for End Location to apply the load to the full beam.
2
Define Tributary Width
Input the member spacing (450mm) into both the Start and End Tributary Width cells.
3
Apply Load Magnitude
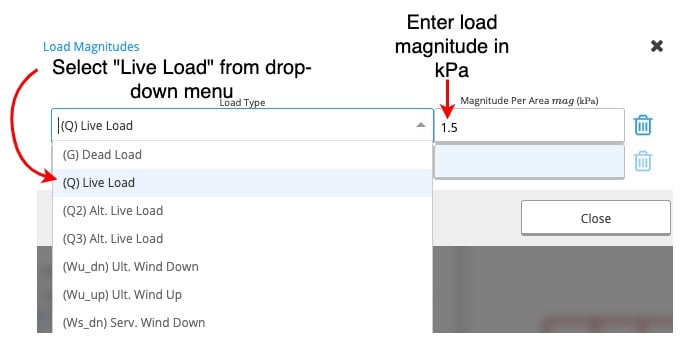
Click the Load Magnitudes cell, select Live Load from the dropdown, and enter 1.5 in the magnitude field.
Example 2
Task
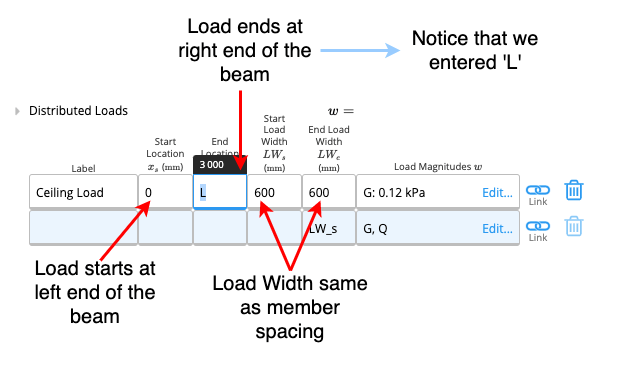
Input a dead load of 0.12kPa on a ceiling joist with a member spacing of 600mm.Method
1
Set the Range
Enter 0 for Start Location and L for End Location to apply the load to the full beam.
2
Define Tributary Width
Input the member spacing (600mm) into both the Start and End Tributary Width cells.
3
Apply Load Magnitude
Click the Load Magnitudes cell, select Dead Load from the dropdown, and enter 0.12 in the magnitude field.
Example 3
Task
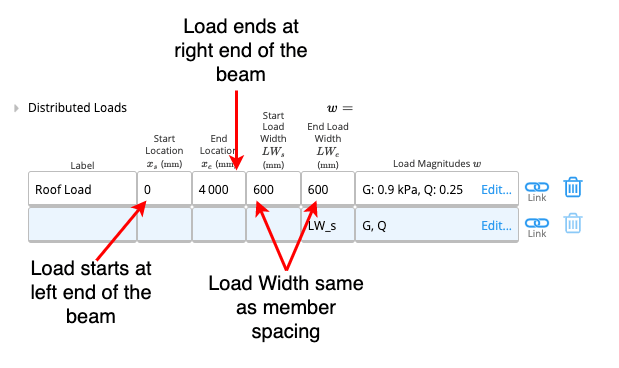
Input a live load of 0.25kPa and a dead load of 0.9kPa on a rafter with 600mm member spacing.Method
1
Set the Range
Enter 0 for Start Location and L for End Location to apply the load to the full beam.
2
Define Tributary Width
Input the member spacing (600mm) into both the Start and End Tributary Width cells.
3
Apply Multiple Load Magnitudes
Click the Load Magnitudes cell to open the load table. Add two rows:
- Select Live Load and enter 0.25 in the magnitude field
- Select Dead Load and enter 0.9 in the magnitude field